Beautiful Barn Wedding In The Country On A Tight Budget.


It turned into such a wonderful venue with some very thrift tricks
Hanging of the fairy lights and calico

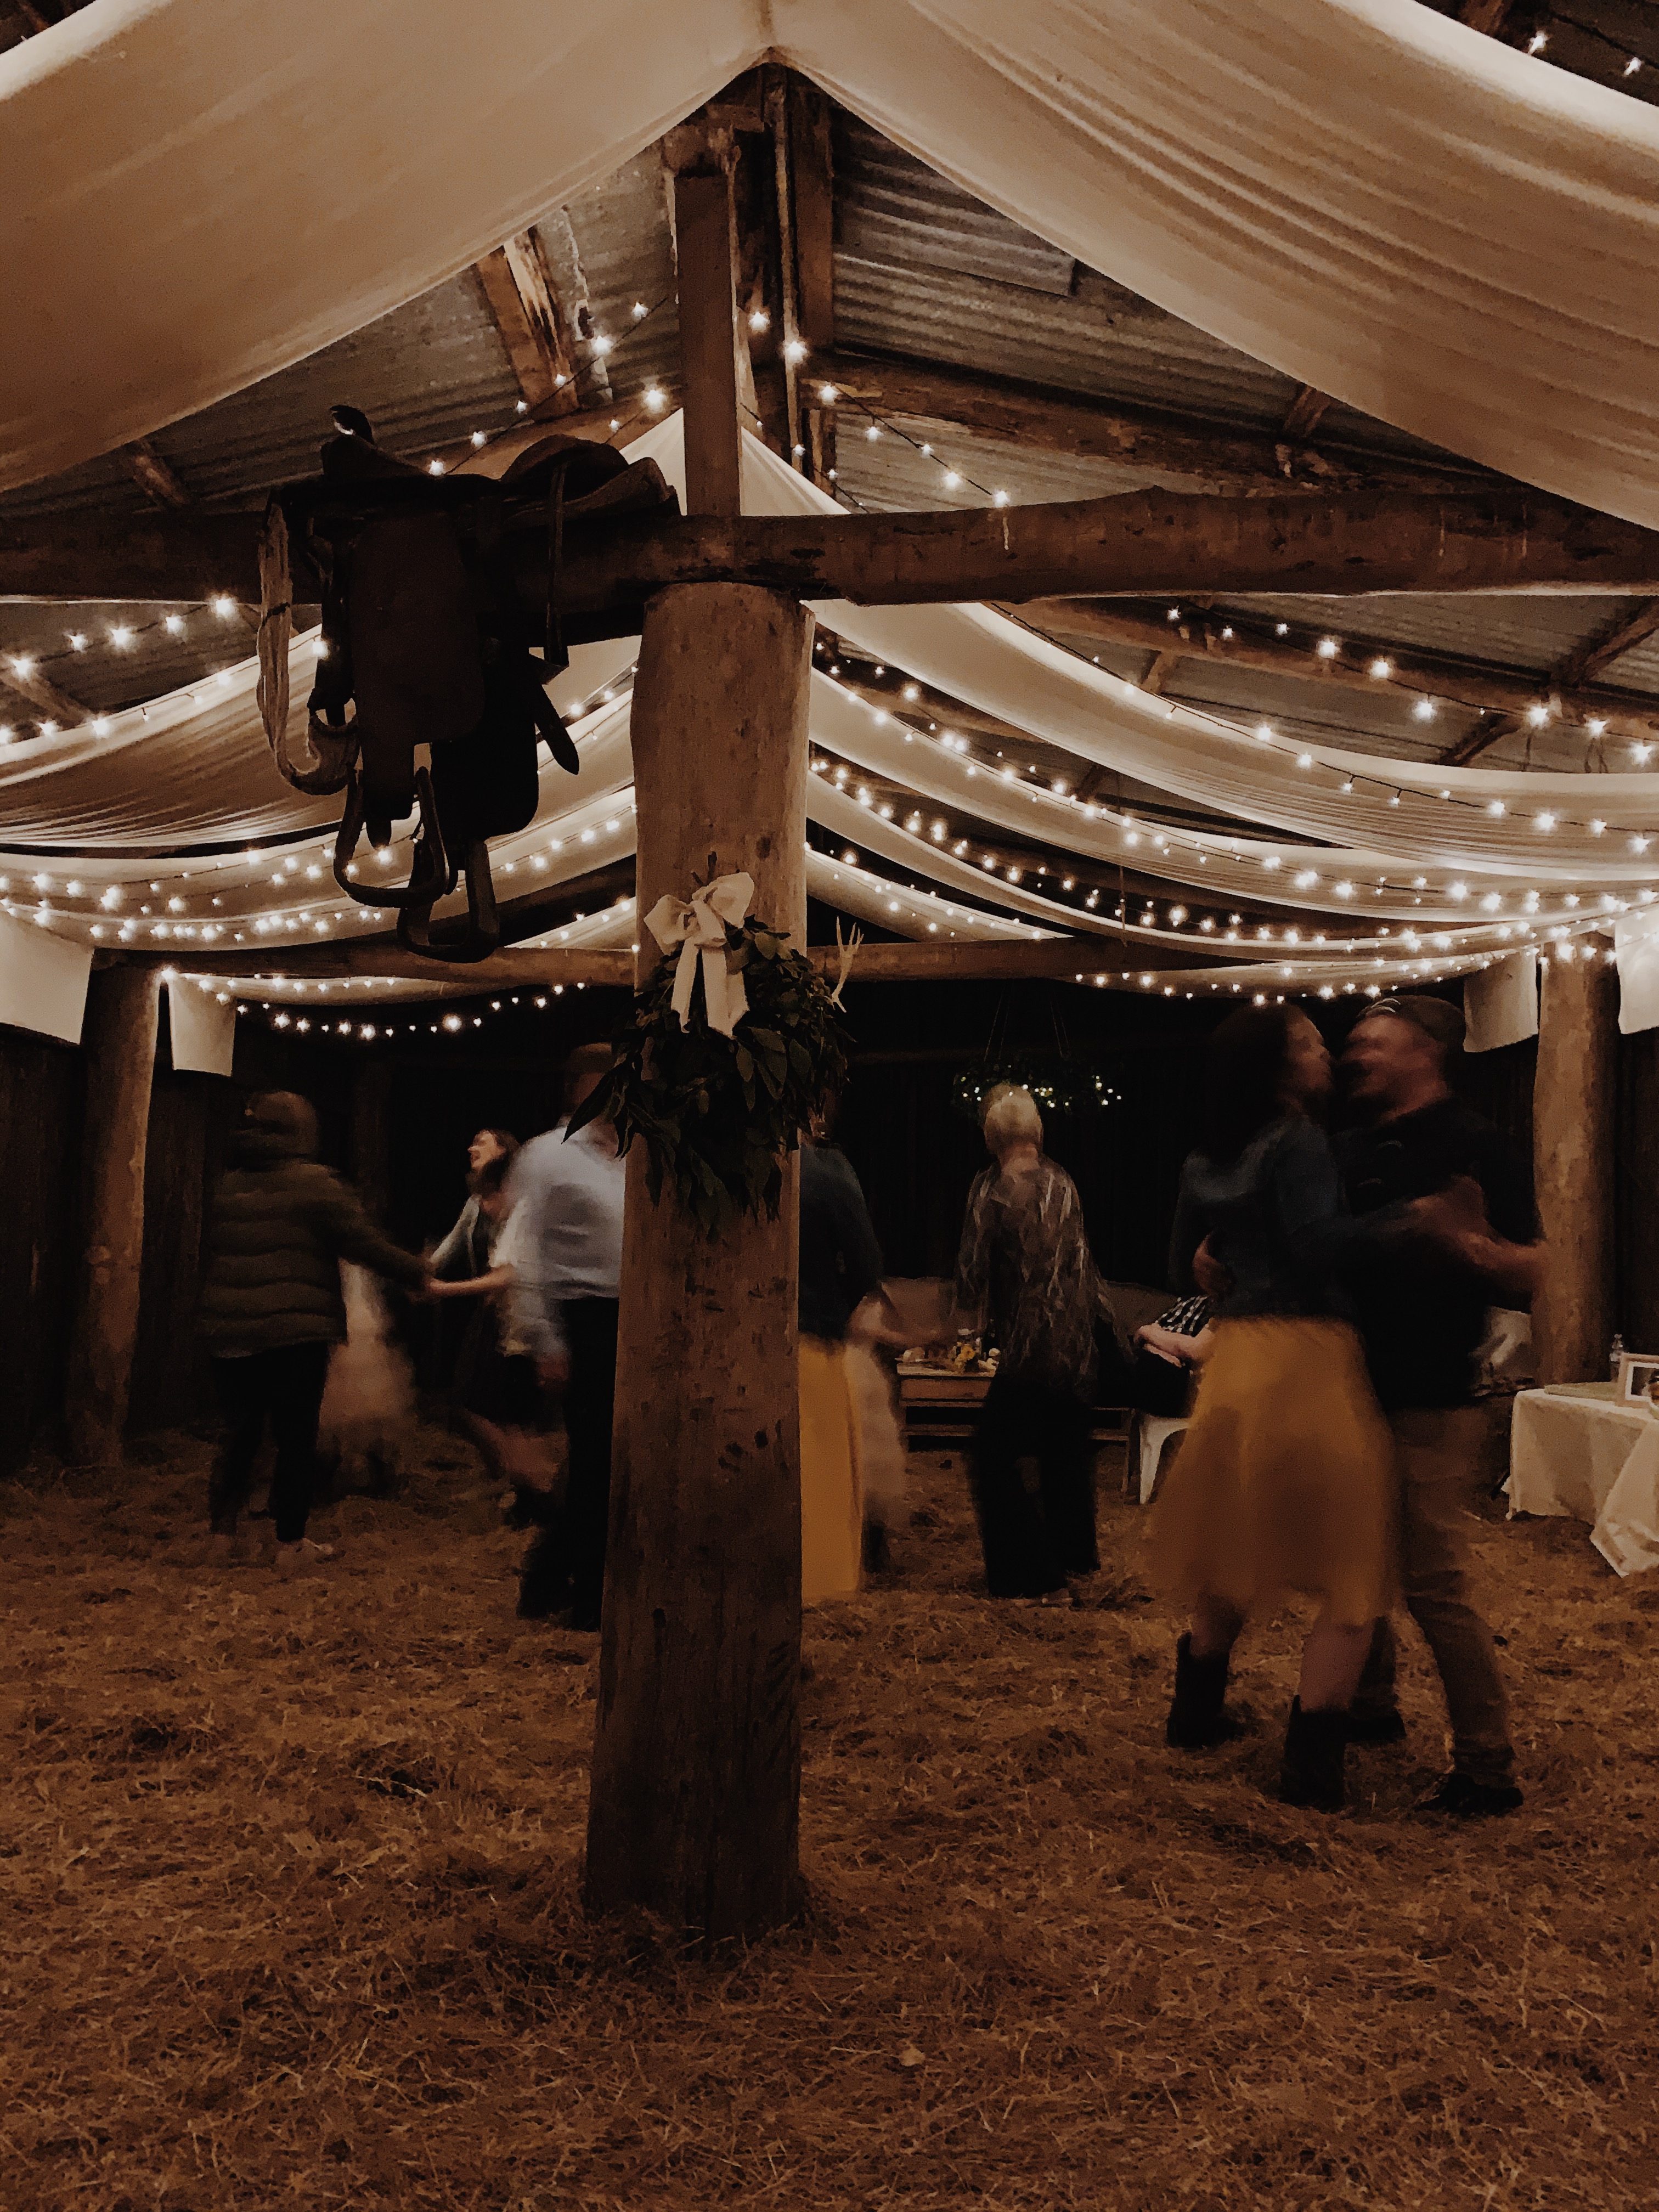
Recently, I got to style a barn wedding in the country. It took two and a half days all up to do – from my end anyway. This included half a day shopping for supplies, and a day and a half to turn an old hay barn into a wedding venue. The couple had literally 3 weeks to plan the whole event, so it had to be done quickly and be cost effective.

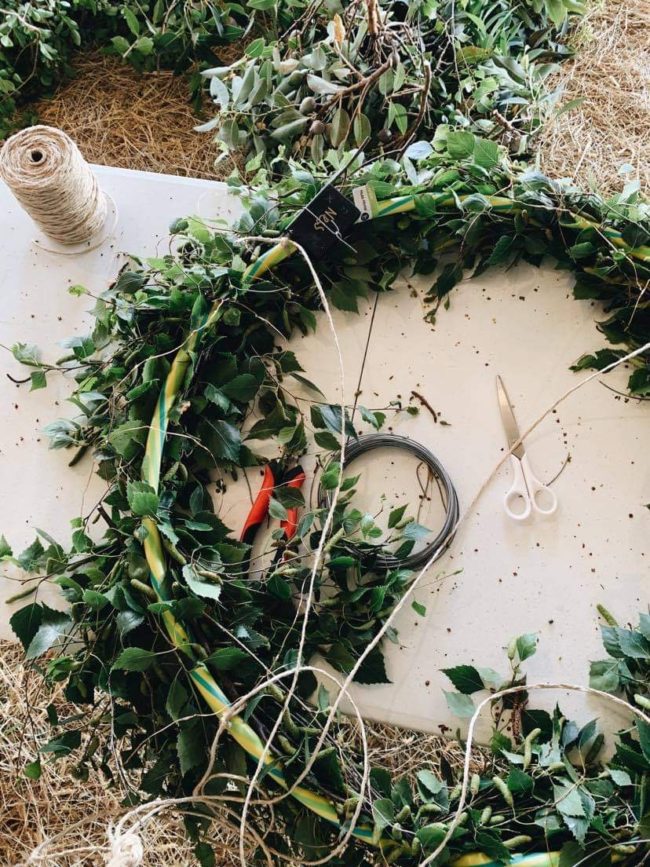
Calico was purchased in 2 bolts ( for about $2.25 a meter) to drape from the ceiling, with 1000 warm white fairy lights to hang in rows of two between each length of fabric. Small fairy lights run by batteries were purchased to put into old glass jars the bride had on hand, which were scattered about the venue for soft lighting. Two hula hoops were purchased for about $5 each, so I could make my signature large wreaths.

My signature hula hoop wreath

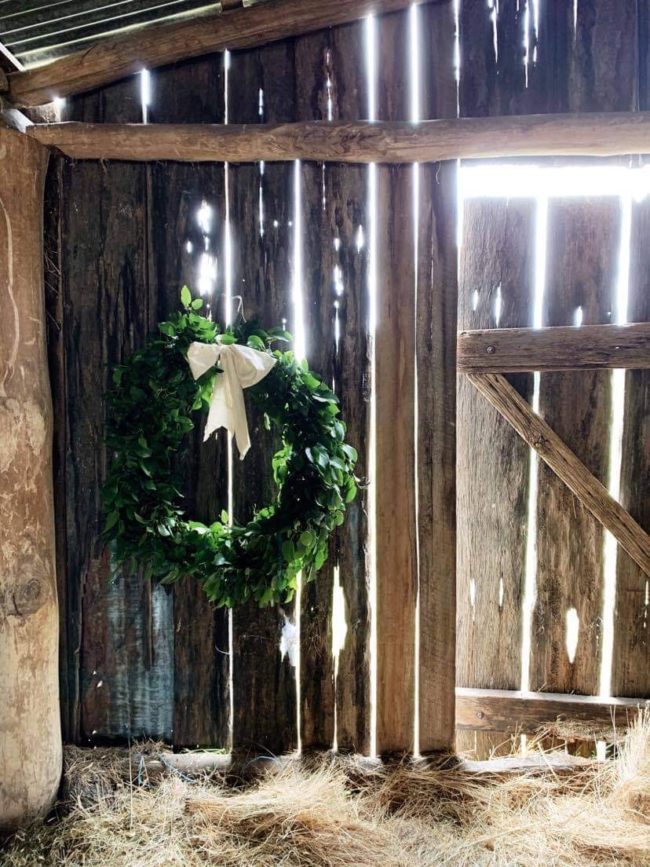
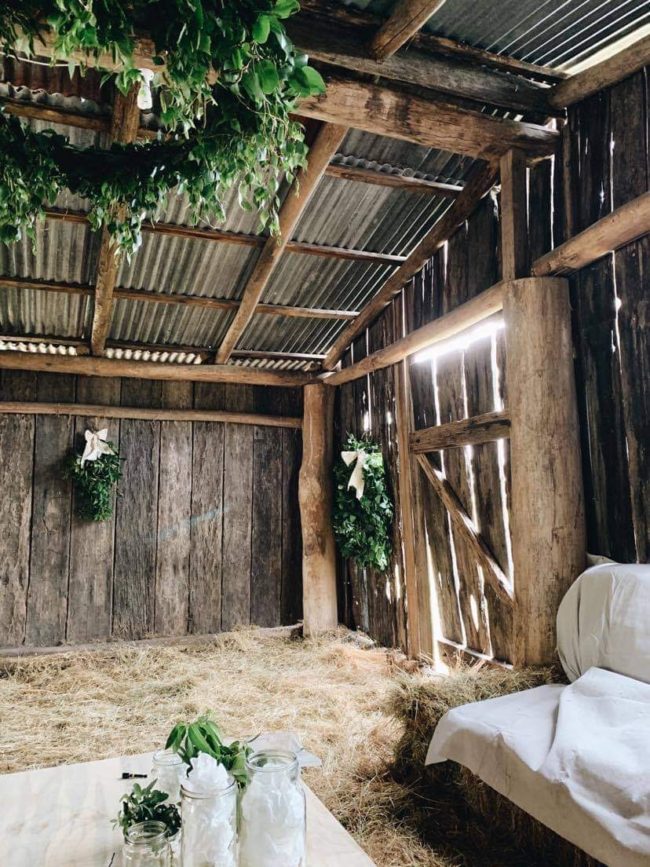
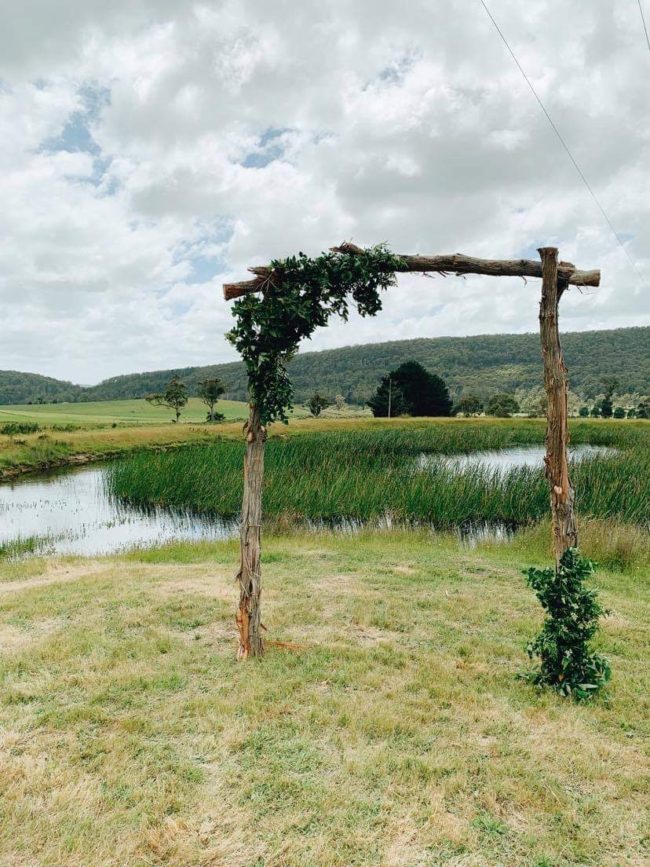
The area where this large wreath was was to be the backup venue where the couple would get married in case of rain.

This was a back up area for the couple to be wed should it have rained. The light was perfect!

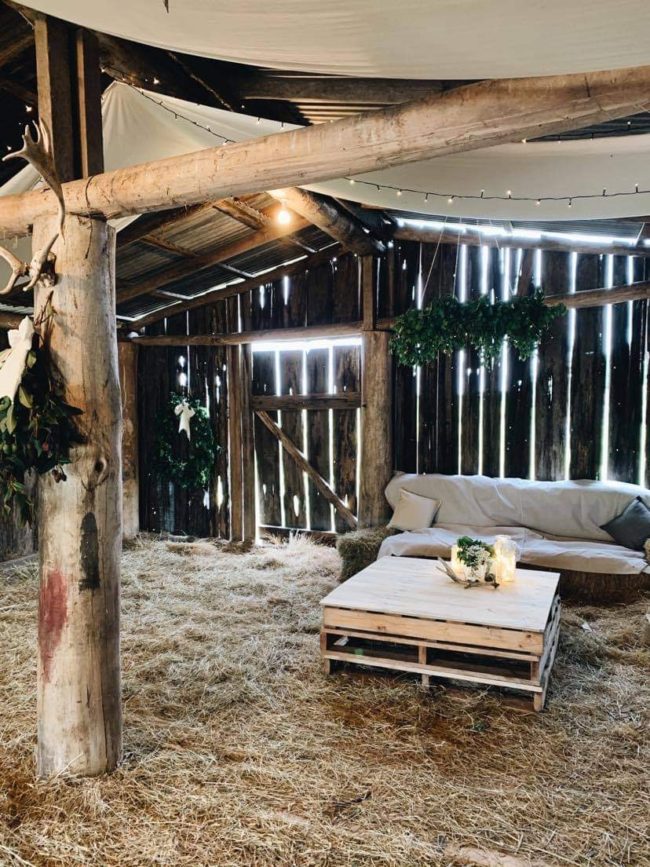
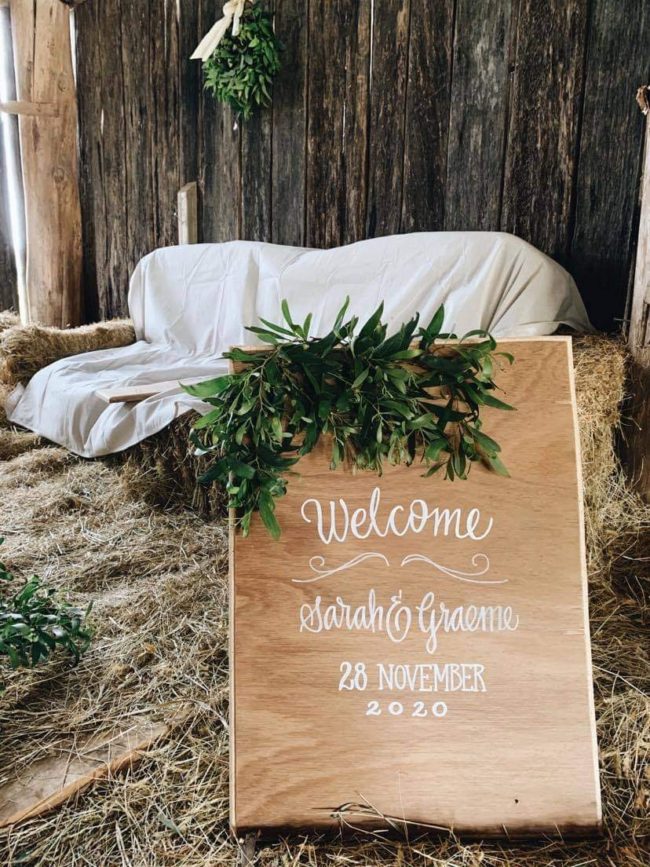
I also made one of the large wreaths to be a chandelier of sorts to hang above a setting area we made for people to sit at. I strung my trusty copper wire fairy lights around it for ambient lighting, and it was hung from the old wooden beams. The boys put some hay bales together in the shape of a sofa, and it was covered with fabric and cushions were added to soften the space. The addition of a few stacked pallets made for a great “coffee table”.

Large wall wreath, hanging wreath, boughs of greenery on posts and the seating area.

In some glass jars of different heights, I added the small battery powered lights, wrapped in white paper, to hide the cords and help project more light. This is also a great way to hide the battery packs.
Large bunches of greenery was wrapped in strips of calico ribbon I’d made to be placed on rack beam, and section of wall, tying it all in.

The groom picked up this old saddle (both bride and groom are horse lovers) and it was perfect hanging up on the beams.
The Bridal party flowers were also made by me. The light from this area was the perfect photo space.
Mic made the signs from old cupboard doors we had on hand that I wrote on, and some greenery added to the top softened it and tied it all in. Most of the greenery came from our own farm- free!
The men made the wedding arch from trees on the property, and I stood in the back of a Ute to fix the branches on.
Constructing the hanging hula hoop chandelier with two types of Birch branches.
The bride bought the flowers loosely from a wholesale Florist, and I made them up for her, with calico ribbon to make it all tie together.

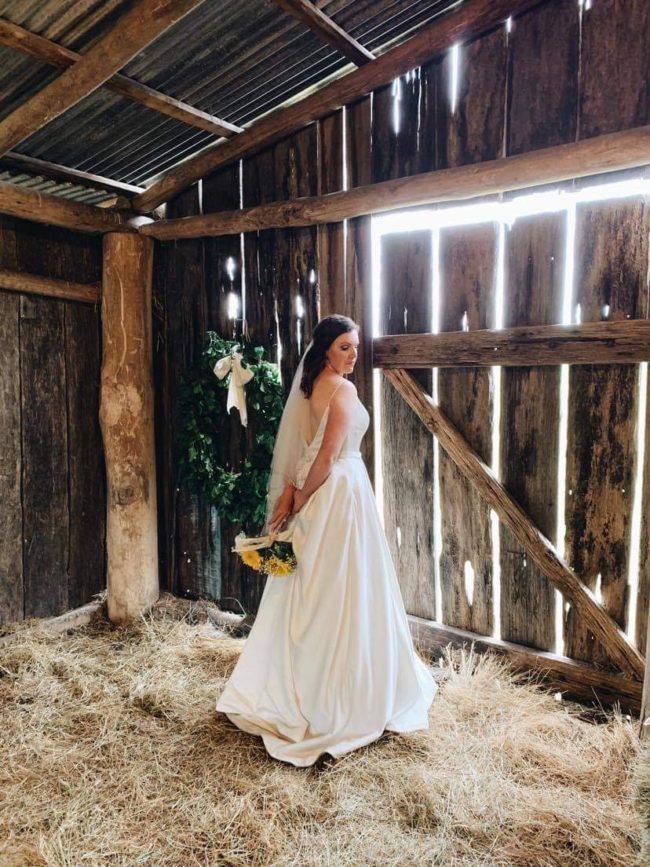
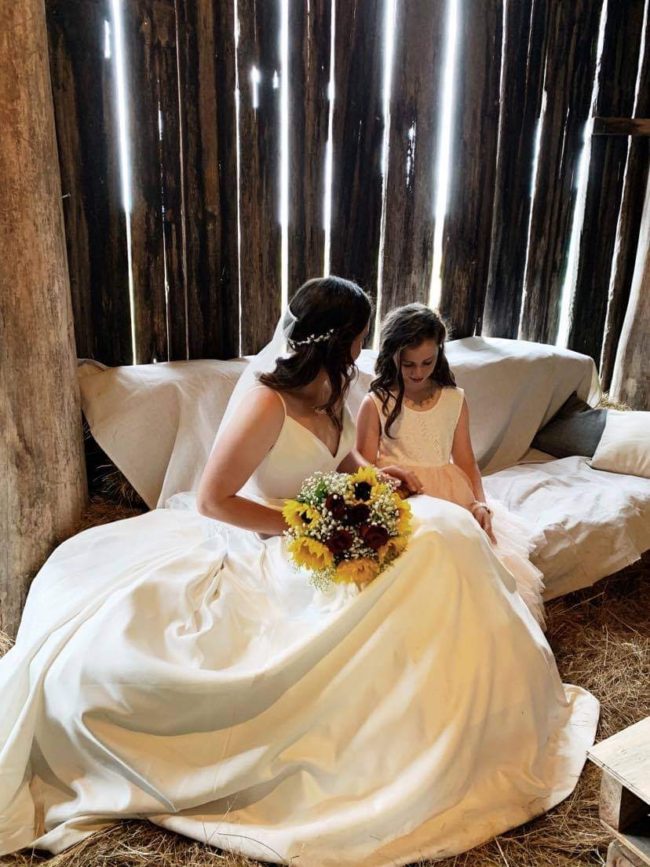
All up the decorating came to a few hundred dollars. I’ve never understood why people spend a fortune on Weddings. The best ones I’ve ever been to have been done on a tiny budget – including our own wedding that guests still talk about 22 years later! As you can see, the Bride looked stunning, the venue was relaxed and beautiful, but it didn’t cost the couple the earth….and it was a wonderful evening!

~ Ness x

Updating an old cupboard with Marley & Lockyer, and vintage pieces.

Recently, I was given a piece thats been in our family for many years. With our family pieces, they are never sold, just passed onto another family member to “look after it for a while”. This piece has a beautiful old original base, but the top had some issues. So, my crafty Dad restored it from my Mums design…and I’ve always loved this little dresser, even more so now as my dear Mum is no longer with us.

I knew I had the perfect corner for it too. This is what was in the space before I brought it into the kitchen. Nothing fancy. You can see it‘s where our dog, Kodah, has her food and water dishes with her bed.

It’s such a cute little piece, and it fit like it was made for this corner. Now, you might know how much I love using vintage and antique pieces alongside my own hand made pieces. So, the more open shelving I can have about the place, the better.

It didn’t take me long to fill it! I whipped around some of our other dressers to grab bits and pieces, and I couldn’t love it more. There is ample storage in the bottom too, which was another plus for another dresser coming into the farmhouse 😂 It wasn’t the best light to take a shot as it was early evening when the sun was starting to set….but you get the idea.

I love mixing the old and antique pieces I have collected over the years with my work, and on this shelf there is a pie dish, jugs, pourers and small crock that I have made with some of my old marmalade jars (I have lots of these), transferware plates and serving platters.

This is another of our dressers that Mic and I restored. It was a big job, but so worth the end result! I took a few things off this piece to move to the little dresser. Here You can see a bit better how I mix my own with my collected pieces.

On the top shelf I have some little jugs I made. The middle shelf has a Divine Wing Plate, Pie Dish, Cut Ceramic Botanic Mixing Bowl, and a small pot just out of shot. Bottom shelf has my small Divine Wing Plate, two jugs I have used as utensil crocks, and a stack of my dinner and side plates. They are mixed in with old transferware plates and platters, old Dundee marmalade pots, big old stoneware crocks, old Scottish stoneware (which is my favourite thing to collect), as well as 3 newer pieces scattered amongst it all.

It’s one of my favourite things to do – mix old, handmade and new… you may have figured that out by now 😂 I would love to hear what you think. Do you like mixing old and new. Or, do you have any favourite Marley & Lockyer pieces you love mixing with old stuff? I would LOVE to hear!

~Ness xx

Coorie, The Scottish Form Of Slowing down.

From my earliest memories, I have known how to create warm, cozy spaces. My Mum would always let me build forts out of sheets, and use plants, lamps, blankets, cushions- whatever I needed to make my little “hut” homely. If it was cold and windy outside, my Mum would have me snuggled up on her lap under a blanket, and would always say (in her Scottish accent) “mon Hen, coorie doon. Cuddle in”. It’s one of my fondest memories.
These times were my first interactions with “Coorie”.

If you’ve never heard of Coorie before, let me explain…Coorie is the Scottish version of Hygge…It means ‘snuggle’ or ‘cuddle’, and more than that, it has taken on even more. It means slowing down, but, it’s not only about making the insides cozy; it’s about making life in general cozy.

Ive spoken about Coorie before, or Còsagach (Gaelic) and how it works with our family home. The term Coorie has been used in Scotland for a super long time. The easiest way to explain it would be to think of a beautiful warm, comforting, safe hug- that’s Coorie!

Cosagach is more about the insides, like Hygge, and coorie is about indoors and outdoors.
However, like I said, it’s not just about making your home warm, cozy and inviting. It’s about slowing down your life, giving more meaning to your home, and family, rather than your work life. Respecting traditions, and bringing more peace to our busy lives. It’s making you embrace what’s really around you…the most important things. During the Covid pandemic, its become even more important, and many have realised how little they actually need to be happy.

The smallest things can bring coorie into your life. It’s about embracing the outdoors as much as the indoors. Taking a blanket outside on a cold day to the fire pit with a hot cup of tea, and your favourite people. Going for a hike with a hot thermos of soup to sit and enjoy the views; collecting leaves and stones along the way to remember the day. Even a simple drive through the countryside can bring coorie to your life.

That slowness in life we’ve had during the pandemic, has been the perfect time to see if coorie is for you. For us it has involved slow mornings, where we aren’t all running around frantic. Taking joy in the mundane things like hanging out sheets on the close line, and that ‘fresh sheet feeling’ it brings. Planting veggies in the garden, whilst the prunings from the fruit trees crackle away in a small fire. Going for an early morning walk while the morning mist lifts to reveal the countryside. Waiting for dough to rise, ready to bake the days loaf of bread. Just taking joy in home, and the people in it.

from our trip back to Glencoe in the Scottish highlands
coorie in under loads of blankets on a cold night
decorating your home with layers of things you hold dear

Decorating with cosagagh, and coorie for me, is bringing lots of natural layers, pieces from family, or antique and vintage pieces, and lots of things you hold dear. On this dresser that my husband, Mic, and I saved and restored, is photos of my parents, grandparents, great grandparents, our boys and us. There are pieces I’ve collected from Scotland like my favourite Scottish stoneware bottles, my own handmade ceramic pieces, items we were given on our wedding day, and little things our boys have found out in nature. All very special to us.

To think all those years ago, my dear Mum was instilling such a beautiful part of our Scottish culture in me, that has shaped my home life, relationships, my business, and my creativity with such a simple sentence -“mon hen, coorie doon. Cuddle in”, has been an amazing gift that has especially helped us through this pandemic. We grabbed the slow living by the horns, and I don’t think I will ever let it go now.

~ Ness xx

How to Calligraphy The Easy Way. Tips And Tricks

If you’ve been here for a while, you would know how much I love calligraphy. From the super traditional, to the modern versions – I love it! Over the years I have learnt to turn my own handwriting into my own style of calligraphy that I use on my ceramic work, and I also teach to others how to do this to there own handwriting in my creative workshops.

While we’ve all been spending time at home recently, I thought it would be the perfect opportunity to share some of what I know with you. So, I created my first social media channel with Instagrams IGTV. I’ve shared a few so far. One on the basics, and another two just adding onto that first one. You can find them by clicking on the highlighted words above.

The newest tutorial today, you can find here. I plan to keep adding onto the skills I’m showing each video, so you can practise your own handwriting calligraphy.
Ive had lots of questions on what brands of pens, inks, paper etc I use. So, I thought I would list them here to make it easier.
Most of my calligraphy Pens and inks come from Calligraphy Supplies Australia. You can visit the online store here.
For inks, I love black Sumi ink. It’s wonderful to write with, and a bottle lasts for a long time too. For white in,, I can never go past Dr Ph Martins Bleed Proof White Ink. I’ve tried almost every white ink out there, and I always come back to this one. It’s a small pot, but don’t be deceived- it’s super thick in the pot, and you must thin it out with water before you start. So a little pot lasts AGES!

You can also find calligraphy inks at art shops, and places like Officeworks too, but the range is usually not as diverse as a dedicated Calligraphy store.
For pens, You can get a basic pen holder for the cost of a coffee.These are great to start with because they’re easy to wipe off any ink you’ll get on it…and you will when you’re starting out- trust me! From the basics, you can go to a Moblique pen holder (which I talk about in the first two tutorials). These are great for beginners, as the pen does most of the work of holding the nib at the right angle…and it can be used a few ways.

For nibs, I can never go past a Nikko G nib. They are SO easy to use if your just starting out. I collect vintage nibs, and love to experiment with different widths, which I would absolutely recommend you to try. Nibs don’t cost very much – a few dollars, and they last for ages with a bit of care.

Kerry from Calligraphy Supplies Australia has made up some amazing packs for beginners for $26. With all that you need to get started: nib, ink, pen holder etc. they are worth having a look at.
Now, for paper, I don’t get to fancy when first starting out. So I just use white copy paper, or you can use lines paper in an exercise book. Get creative though- brown paper is great, cardboard, anything really. I do love to use black paper, and that is always my go too. You can buy packs of black paper in different thicknesses from art shops or places like Officeworks.

So, I hope you’ll pop on over to the tutorials to have a go. I’d love to hear how you get on. I’ve had lots of people sending me what they have been doing since watching them. I’ve really enjoyed that. Also, if you have any questions, please let me know. I’m happy to answer them for you, and hope you have fun with these tutorials.
~Ness xx

*this post is not sponsored or endorsed in any way*


The New Marley & Lockyer Studio/Store

At the beginning of December 2019, I moved Marley & Lockyer from my little cottage studio to a new premised in Launceston, Tasmania.

I opened it as a “pop up shop” a few days before Christmas, and the support blew my mind! I wasn’t sure how people would respond to me moving, but I couldn’t have asked for better feedback. You all love the new space!

The new space for pop up shops and workshops

Ive just had my second pop up over the last three days, and both of them have given me some insight into how I will make the new space work to suit my evolving business.

First, and foremost, my online store is number one. It always will be. I never intended to turn Marley & Lockyer from an online store into a physical, permanent store…this is where the pop ups come into play. You can come in and feel the product, ask questions about it etc, and I like that idea.

So, the pop ups are going to seasonal – Autumn, Winter, Spring and Christmas/Summer. Each pop up will be themed to whatever season it is…imagine where my mind is with this?! Themed! I can go to town styling these events, and I already have a sketch book full of drawings and ideas.

Ive got so many ideas for the pop up events!

The pop ups done this way will be open for 6 days, once every three months. It will be an event! In the meantime the stores curtains will be drawn between pop ups, as it is my studio where I work and wont be open for retail (unless you want to make an appointment, or are attending one of my workshops). I will be leaving a dresser peeking out from them with some pieces on it, and the date of any upcoming openings. A week before the events, the curtains will open in anticipation for the pop up shop.

I’d love to hear what you think, about it all. If you’ve been into visit the pop up shop, i want to thank you from the bottom of my heart. It was so nice to see people driving from Hobart, Devonport, Burnie, Bicheno and more to come and shop.

I’ve got an ONLINE SHOP UPDATE tonight at Https://shopmarleyandlockyer.com at 6pm AEDST as well. So, I’m off to prepare for that.

You are all such a wonderful cheer squad. Each and everyone of you! Have a wonderful weekend! ~ Ness xx