Ah, September. That means that in the studio here, Christmas is everywhere. I know you might be saying “what? Christmas already?!”, but Christmas starts in February here. All of the planning and preparation has to begin then to make sure I can meet demand and to be super organised.
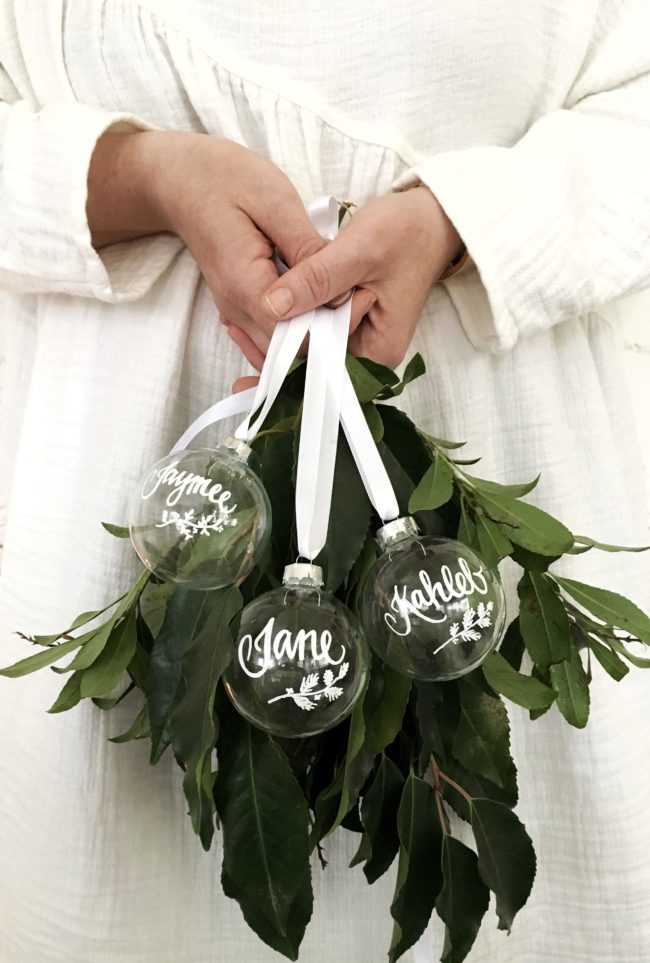
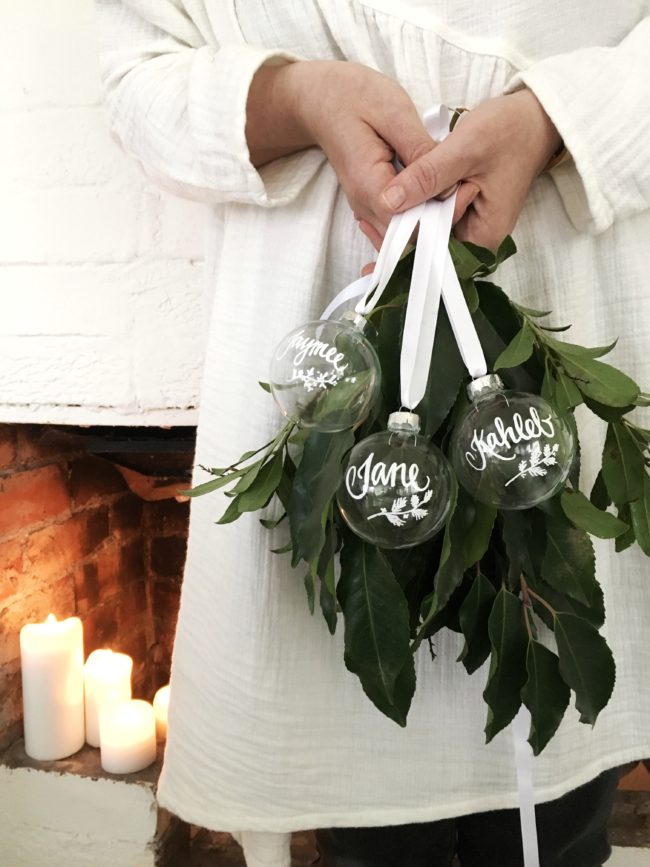
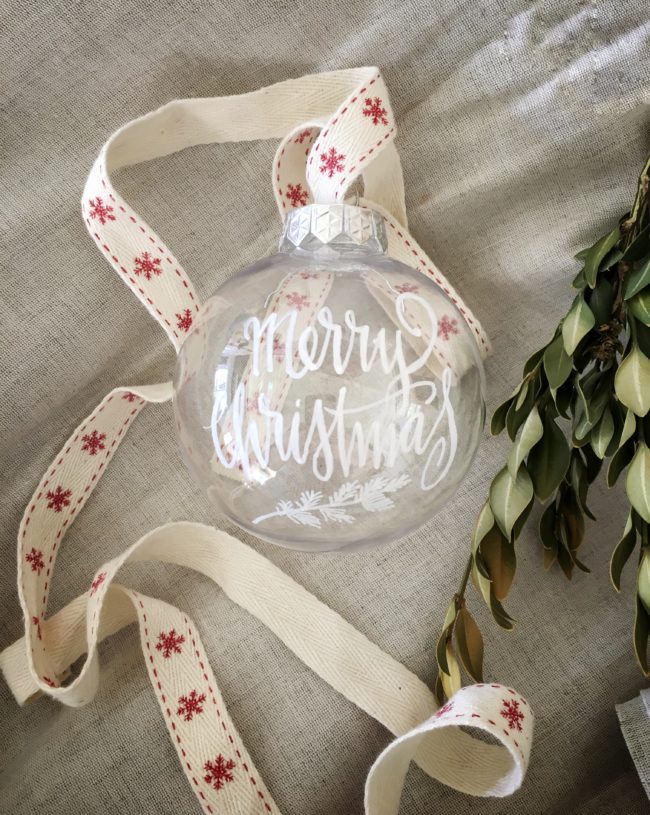
This year, I wanted to go with something customized to compliment my Calligraphy Stars, which are always huge each year. So, I thought about feelings and memories I have from trimming the tree with my Mum when I was young. Christmas was always a huge celebration in our house (still is), and my Mum bought me a red bauble from Grace Bros. when I was a child, that a lovely lady hand wrote my name onto. I LOVED it!
I knew I wanted this ornament to be glass and written in white…because you know me and white things 🙂 After lots of experimenting with the baubles, I was finally happy with the result, and released them last week. They have been a huge success, and I have sold out of the first load with more available mid week.
Each bauble comes with either a white or light grey satin ribbon, and is customized to whatever you want. Hand written by me…
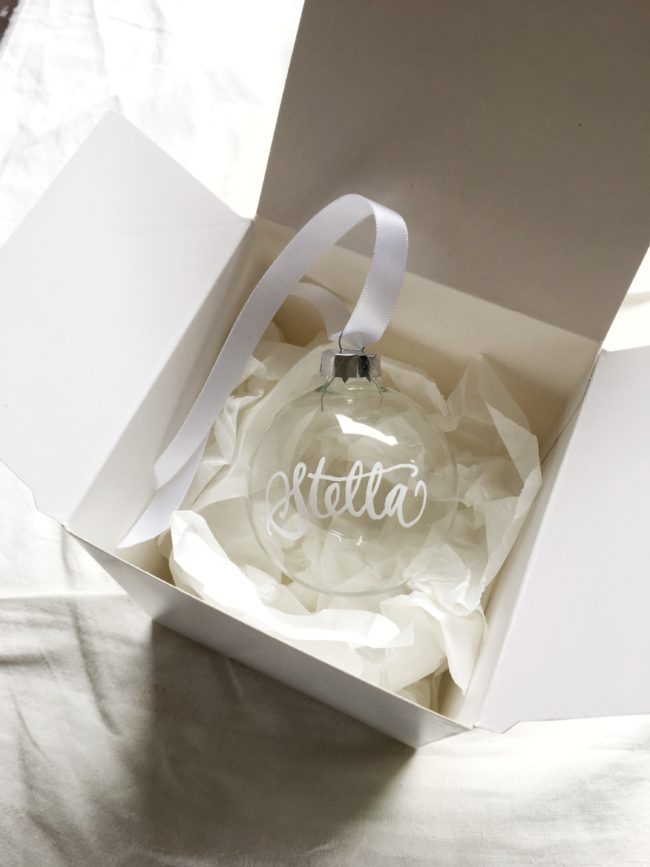
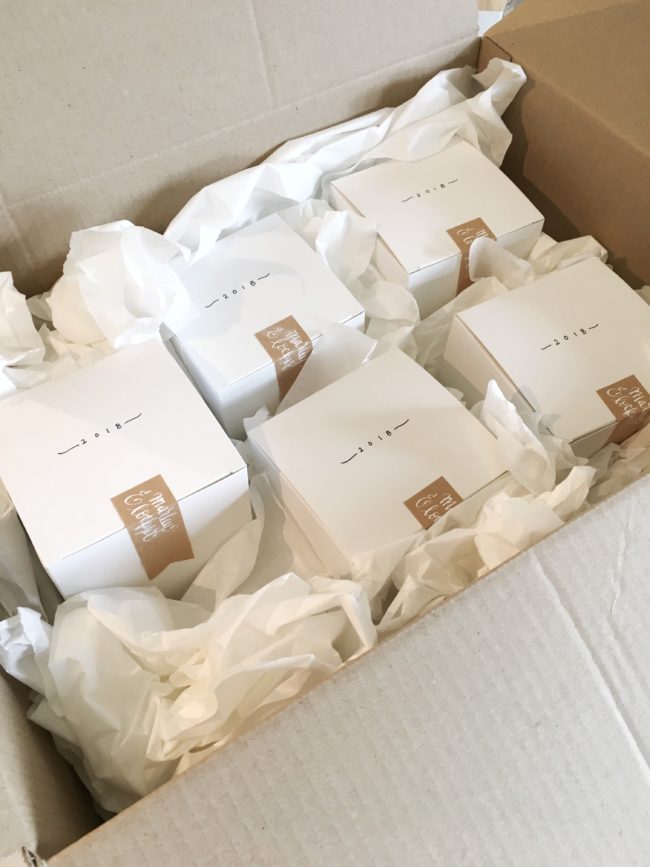
Then they are individually packaged up in their own white box so you can safely store them at the end of the season.
The first batch have already started to be sent around the country, and the rest of the world. If you would like one, and you live outside of Australia, just remember that I do ship worldwide. Just contact marleyandlockyer@gmail.com to get a shipping quote.
There are also these Merry Christmas baubles in acrylic, and I will be releasing some more of the Christmas ceramic range very soon, as well as a limited edition Keepsake bauble. Each year will be a different design. Keep your eyes out for that. In the meantime, I’m buried under lots of new ceramic designs coming very soon too.
I wanted to stop in quickly to let you know that my blog is in the running for the Amara Interior Blog Awards, in the “Best Design Inspiration Blog- International” category, which is a huge honor!
Not being one of those people to bombard you with information on voting, I just wanted to ask you that if you enjoy reading our design escapades, that you might like to stop by and vote for Marley & Lockyer in the awards, please? Voting closes on the 19th September.
You can vote here https://www.interiorblogawards.com/vote/marley-lockyer
Linen curtains have always been a favourite of mine, but the expense when you have a million other renovation projects on the go can be a bit much, so…I made my own, and I LOVE THEM!
But, guess what? They’re not linen…they’re drop sheets!
Ive used drop sheets before in place of linen when our boys were very small to slip cover our sofa, and everyone thought it was linen. I knew I wanted to use them again on our super large windows in the living room after I got several quotes for curtains (our windows are way bigger than standard size) that nearly bowled me over…they were so expensive.
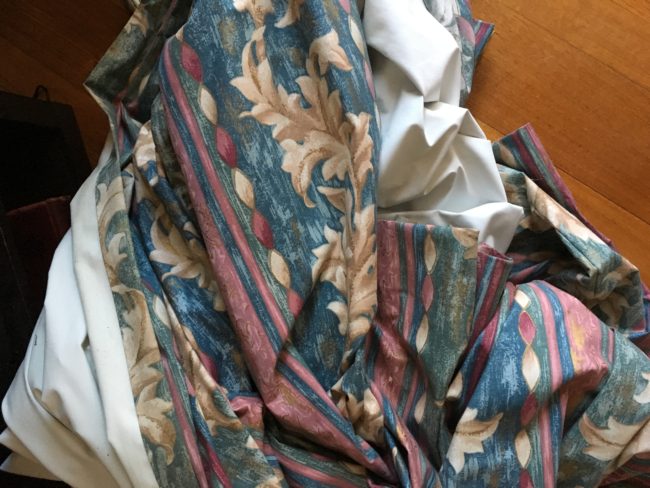
This is what we got when we bought the house that was on the windows. Very well made by the previous owners who did drapes and upholstery for a living…but they were not my style at all.
So, I looked very carefully at how they were put together, and watched some YouTube videos on how to pinch pleat. I didn’t want to do the little clip on hooks. I wanted them to look full and I really don’t like how the hooks make the fabric sit…my OCD kicks in – haha!
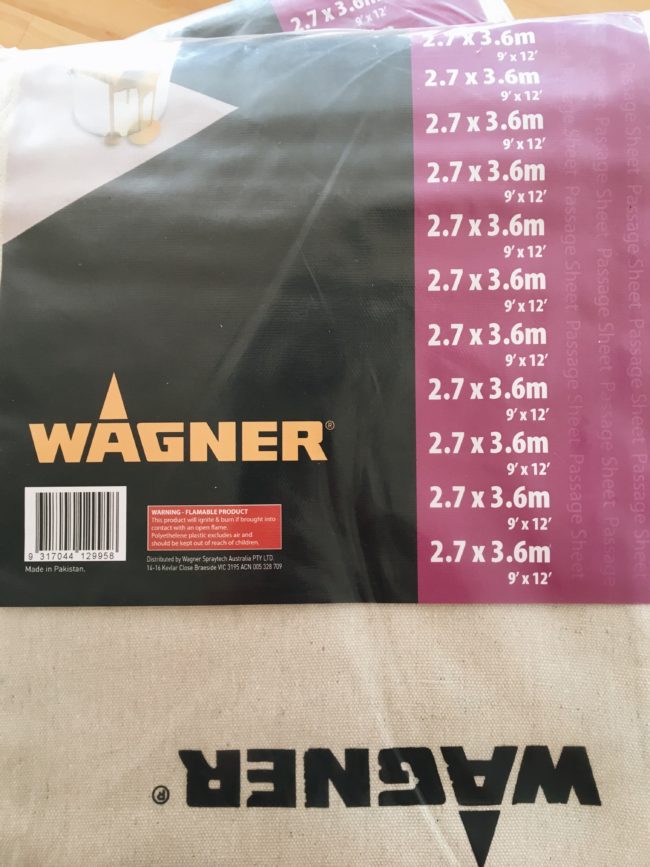
I picked up a few of these Wagner drop sheets (you just have to make sure you get the unlined ones) that come in various sizes. I got the biggest I could find, which were 2.7m x 3.6m.
If you want to try these, here is the really important part….you MUST wash them in a warm or hot wash with some WATER SOLUBLE Eucalyptus Oil. This not only takes the sizing and stiffness out of them, but also the smell. After all they are a canvas. Then I dry mine in a hot dryer cycle. This will soften them up like linen, and they won’t shrink, not matter how you wash them from now on. My sofa slipcovers I spoke of before are still going strong at my sisters house 13 years after I made them!
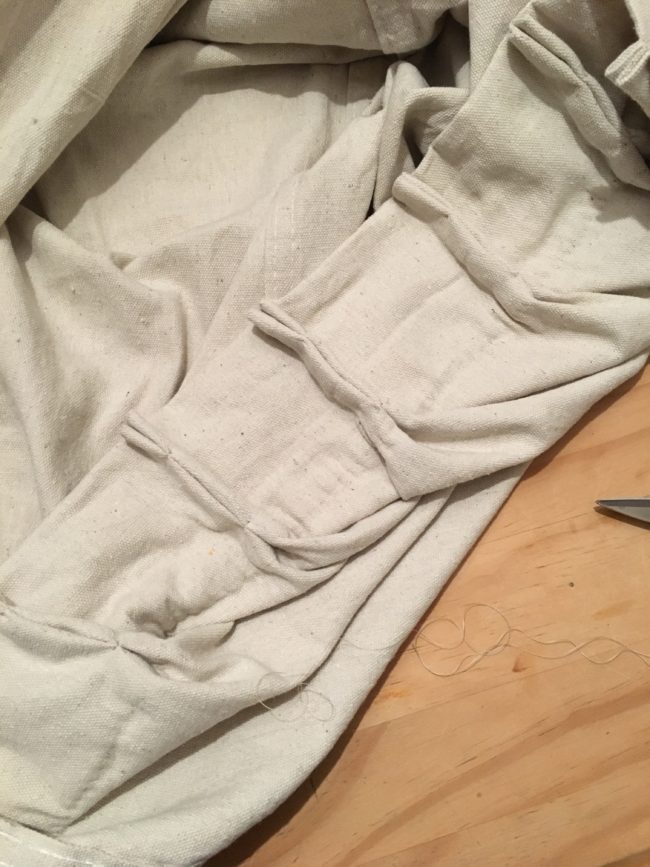
The next smart thing to do would be get your sewing machine, but I couldn’t find either of my two sewing machine power cords! We looked everywhere. They haven’t been used since we moved to the farm, so I’m praying they didn’t get flung out in the rubbish somewhere….this meant I had to hand sew the whole thing -argh!
I basically eyeballed his entire part. I didn’t measure a thing. Luckily I’m used to doing that with ceramics and drawing, but if you’re not good at that then definitely measure. You just pinch about an inch of the fabric and then poke the centre of it down to where you are pinching and grab onto that too. That’s where you’ll sew it. I sewed it in two sections from the front, then through the back because that’s where my pinch pleat hooks would go, so they needed to be strong. Like I said, look up YouTube for some great videos on how to do it.
It took a while because of the whole handstitching thing, but I was glad in the end. I remembered my mum always telling me how my Grannie hand sewed all of her beautiful drapes as they didn’t have a machine in those days. It felt like an accomplishment.
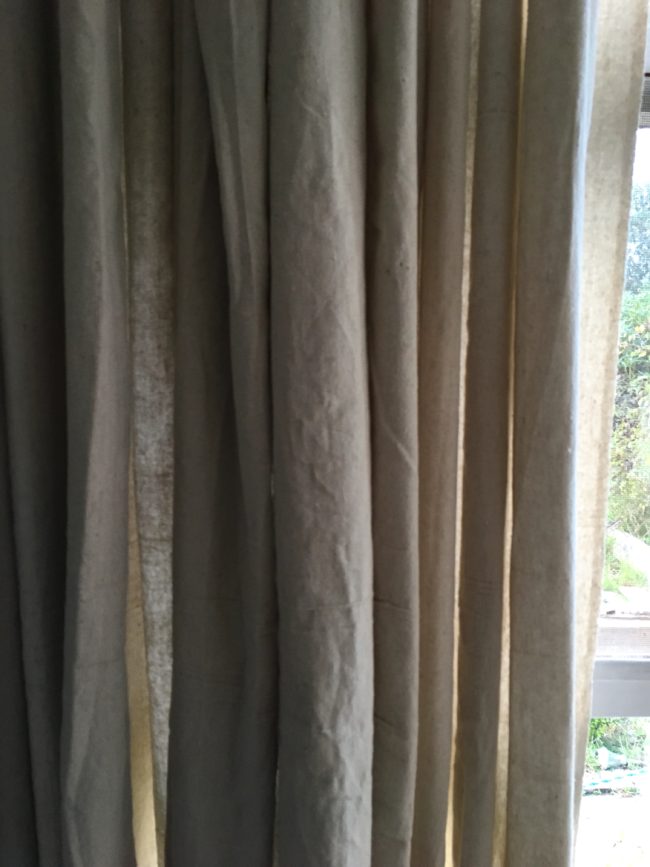
I’m so happy with them. They are nice and thick, stop the sun blaring through this window, without blocking all of the light (I hate dark living areas), and look just like our pure linen sofa covers you can see here. People that visit still can’t believe it when I tell them they are dropcloths!
One huge window cost me $73.00 instead of hundreds $$$. It was a massive saving. They will only get better with age too. Each wash they will get softer and a little lighter. I’m now convinced they will go on all the windows as either drapes like these, or soft Roman blinds.
Weve still got to finish off this room in here, but it’s looking SO much better already ~ Ness xx
Some Saturdays you feel like baking something, but don’t want to have to be in the kitchen all day as you have a million other jobs you want to catch up with, right?
Well, this Chocolate Weetbix Slice is the perfect, quick recipe! It is by NO means a healthy one, but I have made it with coconut oil and natural sweetening products before (I’ll put them in brackets for you). I’ve had this recipe forever, and I think it came from my year 10 Home Economics workbook.
CHOCOLATE WEETBIX SLICE
Ingredients-
180gm butter (or coconut oil. Don’t use as much of this though)
1 teaspoon vanilla paste
1 cup of desiccated coconut
3 Weetbix, crushed (you can use GF ones too)
1 cup of SR flour (or almond meal/GF flour mix)
1 teaspoon of baking powder
3/4 cup of sugar (or 1/3 cup of rice malt syrup, or 1/4 cup of Nativia)
1/4 cup of cocoa or cacao
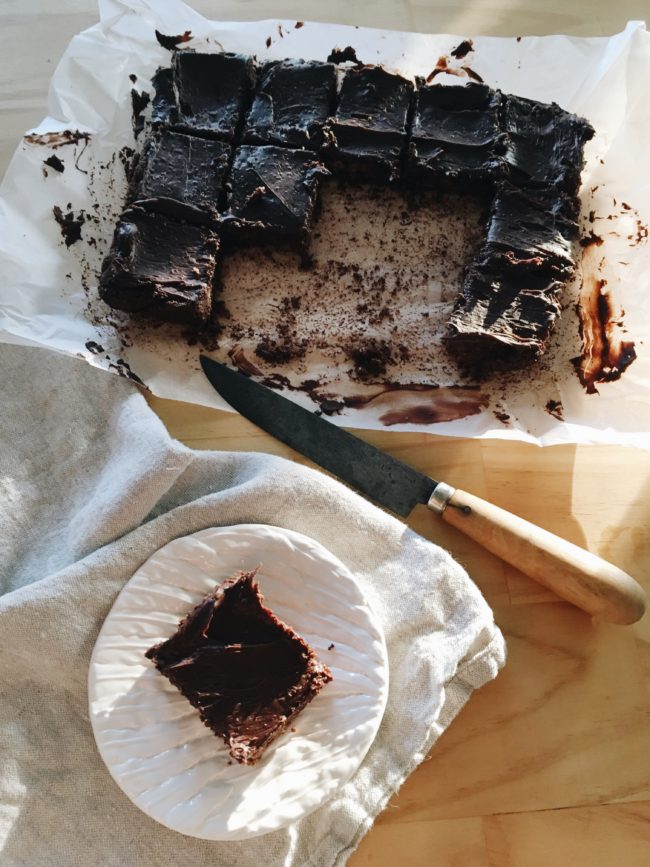
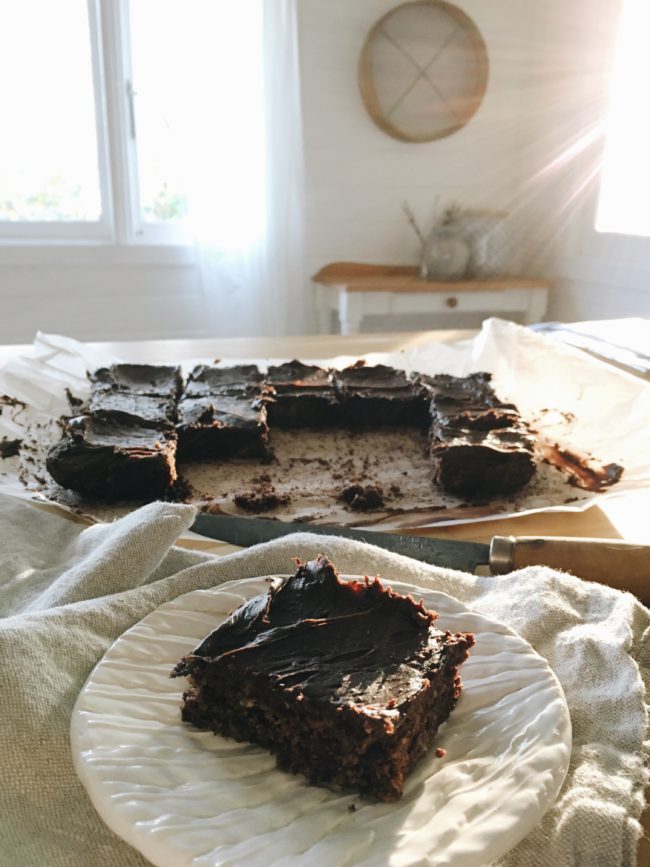
Pretheat oven to 180c. Melt butter and add vanilla, then put all other ingredients into the bowl. Mix well until all of the butter is combined. Press mixture into a lined slice pan. Bake for about 15-20 minutes until firm. Take out of oven and cool. I used Betty Crocker’s Double Chocolate Fudge Frosting to ice it, but you can make your own icing with icing sugar, butter and cocoa. Once it is completely cool, cut into squares and have with a cup of coffee.
It will keep in an airtight container for a week, but it will be gone before then!
Its such an easy recipe, and great to do with the kids. They can lick the bowl too- no eggs!
You might know of my struggle to name ‘my style’, especially if you’ve followed for a while. Well, I’ve finally figured it out. The basis of where it started, and how it has developed to be ScandiScot.
There is a new movement that has taken over Hygge (the Nordic art of making a cozy home), which is called Còsagach, pronounced “coze-a-goch” (the last part is said like the Scottish say ‘loch’). It’s an old Gaelic word for being snug, content and protected. Sort of the same feeling as Hygge. It’s all about natural layers, think tartan (for me in a neutral colour way), chunky neutral cable knit throws, velvet, candles, fire, and maybe a whisky in hand 😉
The two, for me, go hand in hand. Elements of ScandiScot style has always been with me, and recently I was looking through photos of all of the places we’ve called home, how I’ve decorated them, and also looked through all of the magazine tear sheets I have saved for the last 22 years. What I noticed was a pattern of this style evolving.
My very first real interior design influence came from (and still comes from Tricia Foley). Tricia’s style is perfect as far as I’m concerned. Very minimal, but still homely. Based on white with layers of natural textures and materials, it was my first layer to ScandiScot. There’s an element of British Colonial style, but very pared back in Tricia’s spaces. I’ve taken this aesthetic with me on my design journey.
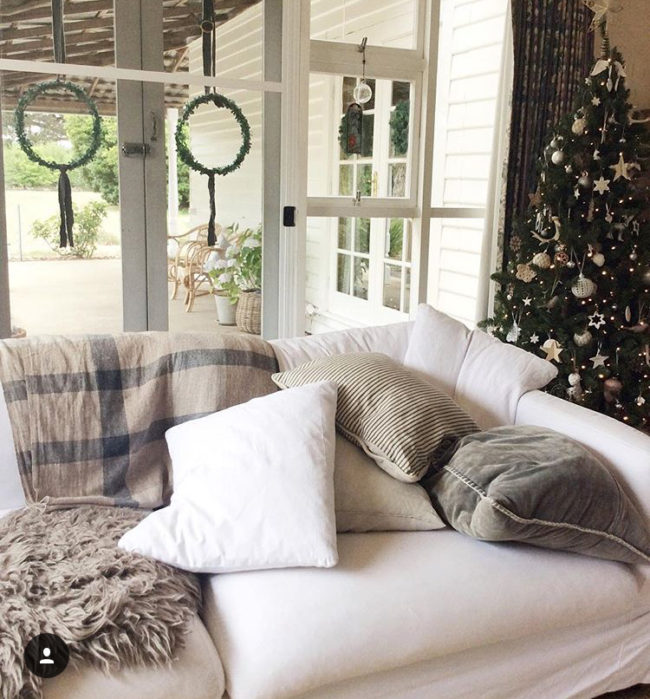
Our living room at the farmhouse is probably both of these decorating styles come together. For me a home must be able to be lived in – warm and inviting and not too precious. Our sofa covers swap between white in summer and natural linen in the cooler months. They are washable and easy to live in, but still beautiful. This photo was taken while we still had those terrible drapes up (which came with the house when we bought the property, so don’t look at those) at Christmas time, but it’s probably a good photo to show you the palette I’ve been using a lot in the renovated parts of our new/old home.
I’ve started to bring in neutral tartans, because you may know my family and I are Scottish, my husband also is of Scottish heritage. There has always been an enormous pull to Scotland for me, and since we visited family there last year, it is very strong in Mic and our boys too. It made sense to have elements of it at home, and I brought back some pieces from our trip to incorporate.
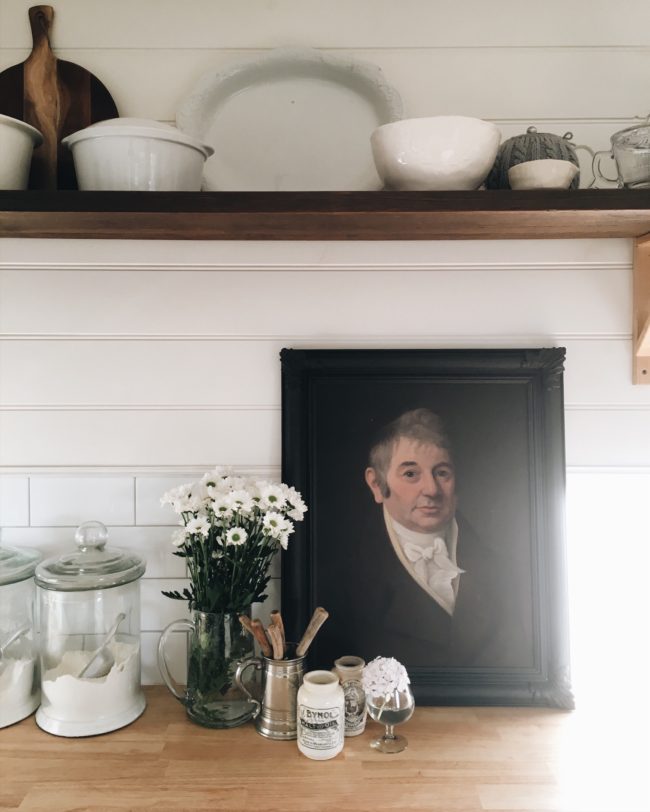
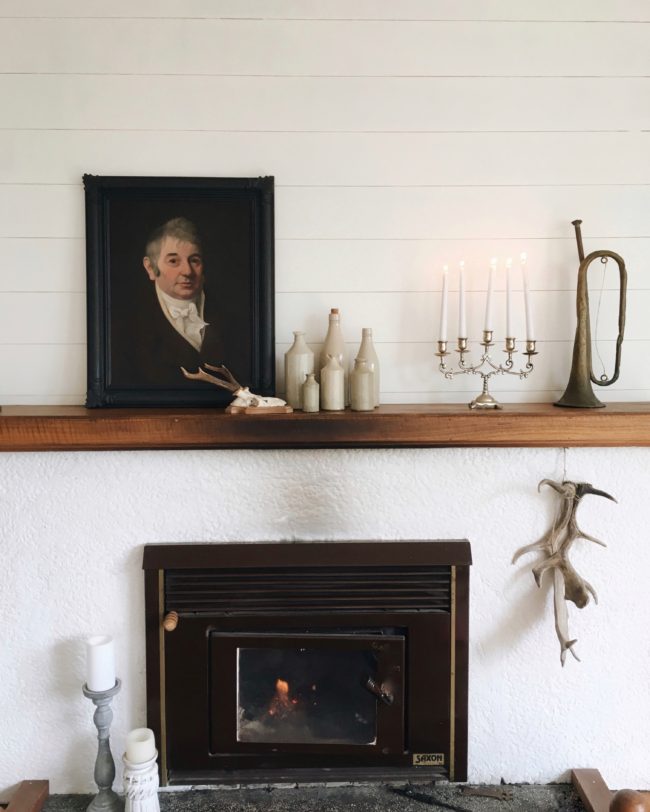
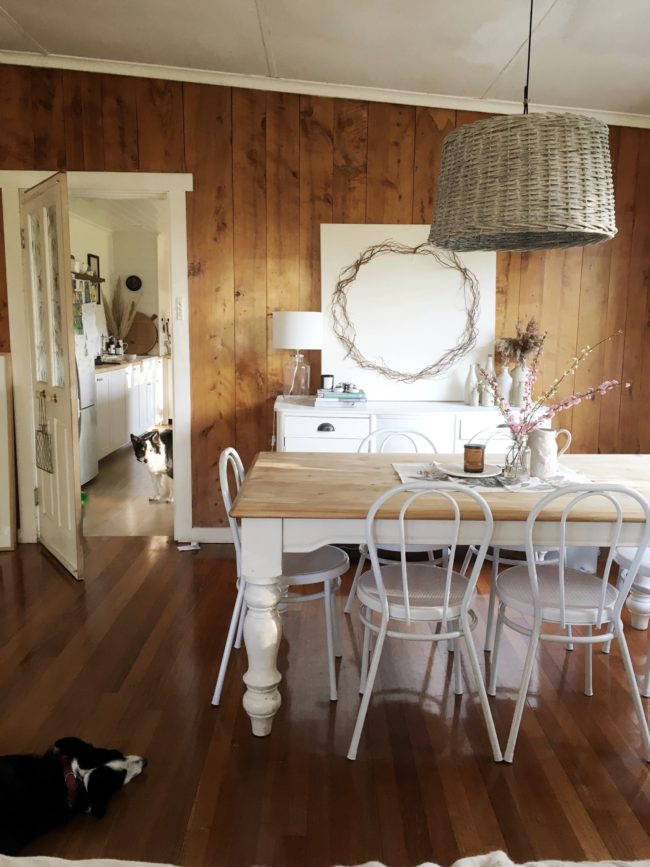
You can see from the first photo that we have added white boards to our living room boards, and this dining area shares that open plan space. I’ve brought in colonial portraits and tonal artwork. My vintage and antique Scottish stoneware bottles fit in beautifully. I have been collecting 5em for years -another layer that was developing to this style. Originally I wanted to get rid of this wood wall, maybe paint it white, but it’s grown on us so much now it is staying. The space needs the warmth this element brings and adds to the còsagach feeling in the room. Years ago, I would have painted it without a second thought. The big wicker pendant light casts the perfect warm glow over our table and plays with the wreath art piece I made from twisted willow years ago. This doorway will soon have a new door with barn door hardware.
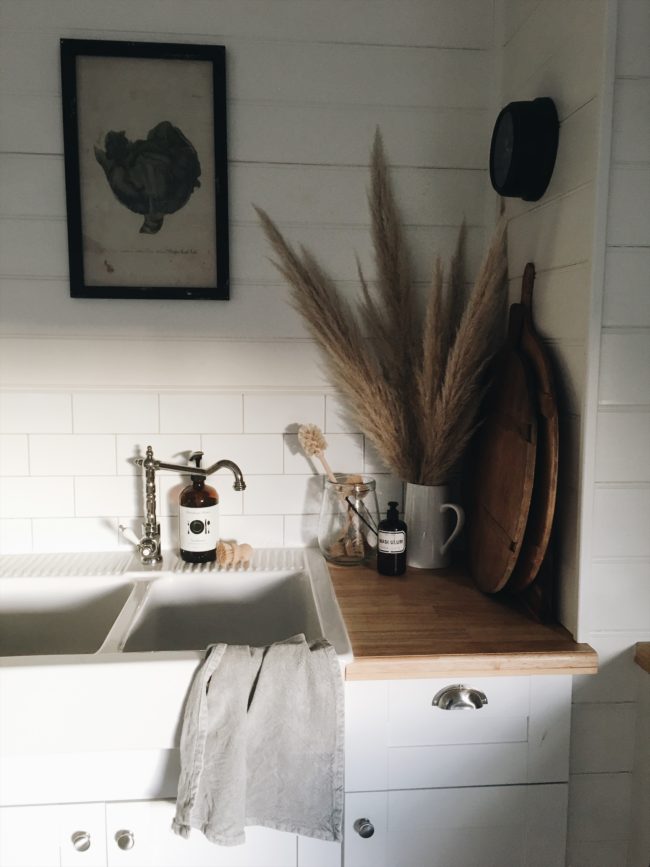
Our new kitchen that Mic and I built at the farm was the first real chance I had to bring this style out for real. As we had packed away all of our things from the last house (and we got rid of a LOT of decorating items that I knew I’d grown out of), I only took what I really, really loved to the farm. It was staring me in the face – ScandiScot!
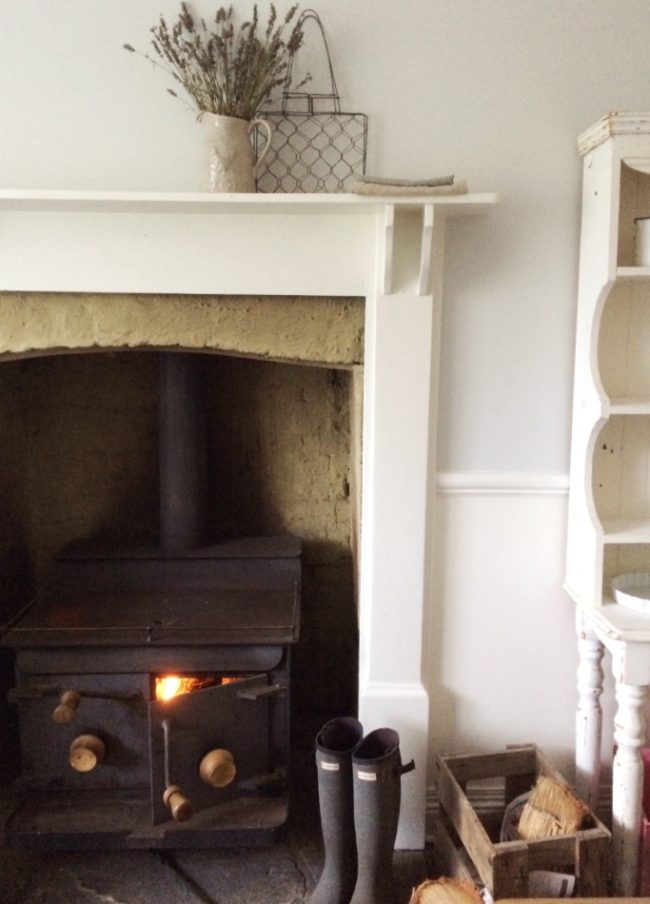
The appreciation of Scandi design with the coziness of the highlands. Not so much the Swedish style, but more Danish. Natural elements rule here, and there is not the minimalist qualities of Danish/Scandi design. It’s all about layers. My collection of old wood bread boards , pampas grass, Amber glass, old botanic prints and linen all come into play. It’s more about cocooning I’m all for that!
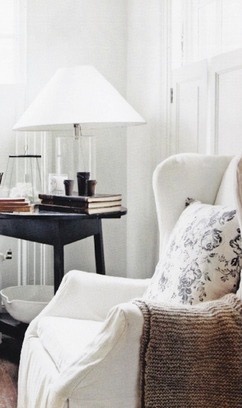
Near the end of our time at our last home (shown here), the feeling I was looking for started to poke its head out.
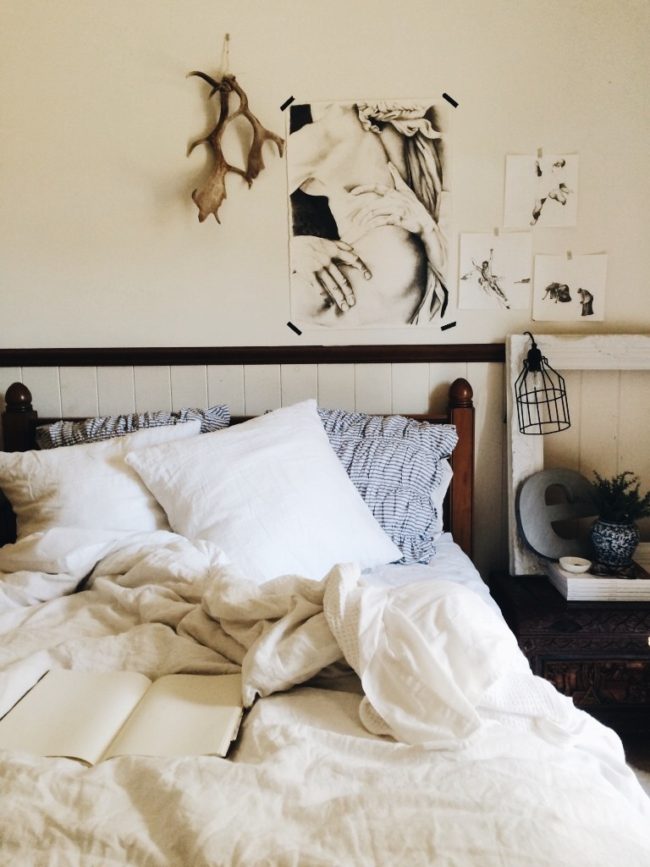
In our bedroom as well. We have yet to renovate our room at the Farm, but it will have the white boards like our living room (image 1). We’ve changed this bed over to our guest bedroom, and I’m thinking of having a linen covered headboard made.
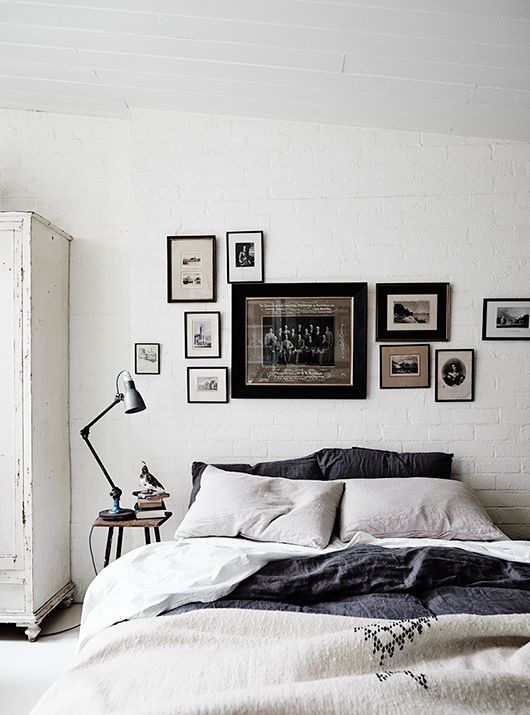
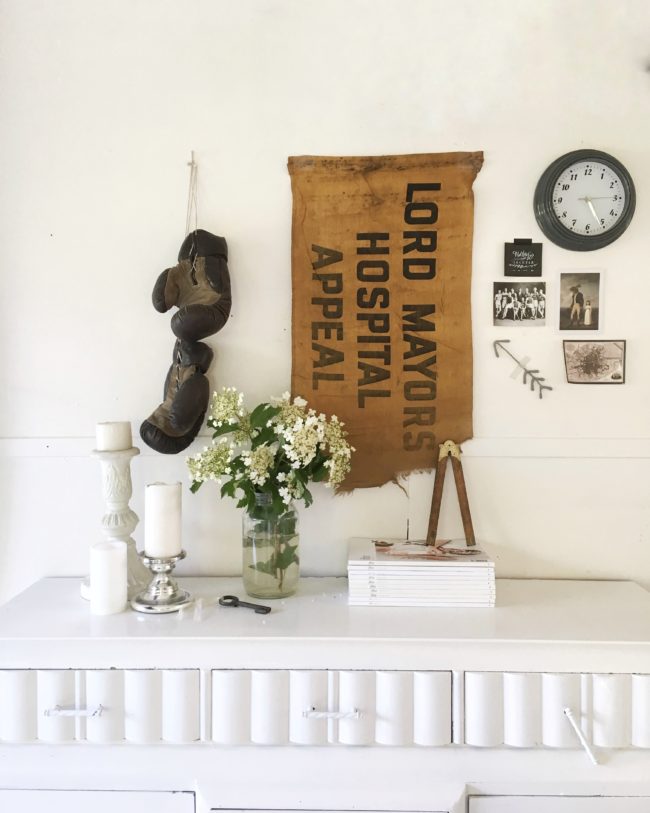
Lynda Gardener has also been a big influence on my style. Not for nearly as long as Tricia Foley though. Lynda is an Australian interior Designer/stylist and boutique accomodation star. Lynda’s love of grouping old art pieces and prints with natural textiles, anchored with white floats my interior style boat a lot. Her body of work is stunning, and I’ve learnt a lot from Lynda’s style.
Especially how to pull a gallery wall together with vintage pieces mixed in. This photo is from my studio, and I picked up this old flag to use on the wall to add a bit of interest to my other old pieces and to warm up the all white space. I think it works really well with my vintage boxing gloves and carpenters ruler.
I’ll talk about ScaniScot style more, and I know you’ll be hearing a lot more about Còsagach as it’s tipped for big things this year, taking over from Hygge.
For now though, I’m just happy to have found a style I really connect with. Im happy it’s not a mainstream style too. It’s exciting for me to see just how long this has been waiting to be pulled together from all of my loves and influences.
That beauitful influence from Danish design, the traditional influence from a paired back/relaxed British Colonial style and the warmth and cocooning feel of a highlands stone house has me right at home -literally!
all photos, except ones mentioned are by Ness Lockyer